I am so ready to see some spring flowers! In the meantime, I always enjoy stamping and creating some pretty floral cards. When I discovered WPlus9, the first set I knew I had to have was Mother's Day Bouquet. It has such pretty flowers. Later, I added Folk Art Florals to my collection, and, well, let's just say that my collection has grown considerably since then. :)
This week's Monday Mood Board challenge over at WPlus9 was great motivation to bring some spring into my craft room. Isn't that color palette just gorgeous??
On my first card, I created a plaid background and a pretty floral pattern in melon and yellows. I stitched around the edge of the floral panel and de-bossed it with a quatrefoil plate.
I added some beautiful doily details with the Lacey Layers stamp and die set, and topped it all off with a button card and heat-embossed, coaster board buttons. A little extra texture with some loopy bakers twine, and I called it complete.
I wanted to do a second card in a CAS style to let those pretty flowers take center stage.
I added a punched vellum butterfly layered under a fussy-cut stamped butterfly from the Mother's Day Bouquet set.
Two very different designs, but I love them both very much.
Happy Spring! :)
Thanks ever so much for stopping by!
This month's PTI Blog Hop challenge is to create a project incorporating sequins.
This month's challenge is another I have not done before ... challenge accepted! :)
If you would like to check things out for yourself, you can find out all about it here.
I had to order some sequins for this month's challenge. I really wanted to get some yellow ones, but they sold out before I put my order in. Darn! Well, I will work with what I have. :)
A couple of weeks ago, I saw this card by Chari Moss. I knew right away that I wanted to try her sequin technique. Here is my first take:
I used 1/8" score-tape in lines to adhere the sequins and it went surprisingly quick. I kept the card design simple, letting the sequins take center stage.
All supplies (minus the sequins) are from PTI.
My second take on this sequin technique uses a word die. I wanted to make each letter it's own color, and tried my best at a rainbow using the colors that I had on hand.
I stamped a secondary sentiment and then decided to sew a border around the panel that ended in what I'd hoped would look like an arrow. :)
I thought this would make a fabulous birthday card.
Thanks ever so much for stopping by!
One last post for the Pattern Play online card class! This one is on paper piecing stamped images with patterned paper taught in Class 2.
I have always wanted to try this technique and admire it dearly when I see it done, especially when it's done by Betsy Veldman or Melissa Phillips. :)
I didn't stray too far and used this card by Betsy for my inspiration.
I spent about 8 hours saturday working on this piece. Yikes! Yeah, seriously. I intended to make a card, but it took on a life of it's own and kept growing and growing. When all was said and done, I thought it was just too much investment to put into a card, so I decided it would be better suited as a baby room decoration. All it needs is a frame.
I broke out my brand spankin' new 6x6 Maggie Holmes paper pack and was able to incorporate 8 different patterned papers, or 9 if you include the subtle paper print I used for the clouds. I had to laugh at myself as I found it a little bit difficult to rip that first sheet of paper out of the pad!
I heat embossed the sentiment at the bottom. It's very subtle, but still easily noticeable. I could have inked around the sentiment to make it stand out more, but decided I'd rather have it blend in with the design.
Well, that's it for me! I'm hoping to continue using up my patterned paper even after the class is over!
Thanks ever so much for stopping by!
Another post for the online Pattern Play card class. I am so happy to finally be using up some of my patterned paper!
A good friend of mine's husband will be turning 50 next month and she asked for friends to send cards so that he'll have 50 of them to open on his birthday. Of course, I couldn't buy one ... handmade it is!
During the last PTI release, Jess Witty made this card and I knew in an instant that I would CASE that card for this occasion!
I used my silhouette to cut out the numbers, both from my card base and from my bold patterned paper. Since it's his 50th birthday, I chose a mostly black patterned paper.
I kept my card a bit simplier than Jess's by skipping the clear cardstock layer and inking the paper edges instead of stitching. I really like the results regardless of the changes. Hopefully my friend and her husband will too. :)
Thanks ever so much for stopping by!
I am so thrilled and excited to be taking my first online card class! Especially this one ... Pattern Play! I have so much patterned paper that I've collected from my scrapbook days, and then even more during my card-making days ... it's crazy! I am so excited to be taking a class that can help me use up some of that pretty paper.
I originally bought this patterned paper to make some notecards for my DD's teacher who is Italian, into cooking, and has a cooking-themed classroom. I am so thankful for the Pattern Play class because I was able to make 5 cards to gift to our wonderful teacher with this paper, when otherwise it probably would have continued to sit until the year was over and time ran out! My 10-yr old DD even insisted on making a card using the Class 5 paper-weaving lesson.
The first class lesson I was trying to apply was to utilize a few different patterns of paper together using the "Bold, Basic, Blah" tip from Amber. Here is the first card made (and my least favorite as well - haha!):
I used the edge inking technique on some of the layers, and popped up the sentiment with dimensionals.
The first card took me three days to finally complete. Yikes! I found my biggest roadblock was coming up with sketches that would play well with multiple paper patterns. I did some online searches and looked through the inspiration folder on my computer. I picked out a few designs I liked and then tried to apply them with my supplies. It worked! I had a creative spurt and made the bulk of the next 3 cards in one day, finishing with sewing and button details the following day.
My card above was inspired by the design of this card by Ashley Cannon Newell.
My card above was inspired by the design of this card by Debbie Olson.
The next card uses a bit of vellum over my pattern paper to help make the sentiment stand out, rather than get lost in the pattern - a technique taught in Class 3.
My card above was inspired by the design of this card by Leigh Penner.
This next card is the one that DD insisted on making. She really wanted to try out the paper weaving technique shown in the Class 5 video, so I guided her through the process, although, I'd say she made about 80% of the card, including some of the sewing!
She stamped the tone-on-tone background pattern, made the paper-woven block, sewed on the two long sides of the block, and picked out the button colors. I just guided her along, sewed the two short sides (so that I could turn the corners for her), and stamped the sentiment. I love how it turned out! Hopefully her teacher will too. :)
The card above was also inspired by Leigh Penner's card here. I love Leigh's cards. She has a real gift for incorporating patterned papers onto her cards!
I'll be posting more class projects soon. Thanks ever so much for stopping by!
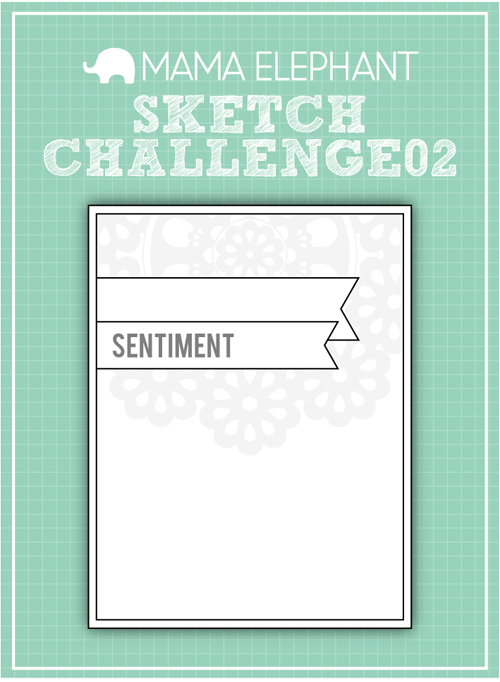
Today I am posting one last project I made to enter into the Mama Elephant Sketch Challenge 02. If you would like to play along, you can find out all the info here.
I was originally planning to place the sentiment block at the top of the card, but decided to turn the sketch upside down for this one.
I broke out my new neon inks for this card. Being a teenager of the 80's, nothing says ROCK to me like neon does! Haha!
I added some shimmer paper in neon-ish yellow and blue at the top of my panel to help balance out the color block at the bottom.
Love that little star in the center of the O in "Rockstar"! This will be the perfect birthday card for my DD to gift to one of her friends ... been in Justice lately? ... it is loaded with neons! Everything old is new again! :)
Thanks ever so much for stopping by!
Today I am posting a project I made to enter into the Mama Elephant Sketch Challenge 02. If you would like to play along, you can find out all the info here.
I recently spied nail polish used on cards and wondered if it has (or will) become the next big trend. Regardless, it just looked like so much fun that I decided to give it a try!
The shine of the polish just doesn't photograph well, but that didn't stop me from trying!
I did an ombre-inking effect on the sentiment and love the way it turned out! I think this is my absolute favorite Mama Elephant sentiment ever! I mean, don't you just love that heart in the middle of the O?
Supplies: All papers and ink are from PTI, stamp from Mama Elephant
Thanks ever so much for stopping by!
I fell in love with the Happy Harvest stamp set from WPlus9 the moment I laid eyes on it. I'm not even what I'd consider a country girl in the least. But, this set is just so fun! I've been wanting to make a project with it ever since it was released and the Monday Mood Board challenge over at WPlus9 was the perfect motivation!
The green, yellow, and red color palette of this week's mood board just screamed "country" to me, so I pulled out the Happy Harvest set and went to town!
- photo removed -
I used the coordinating die set to easily pop-up the elements for added dimension. The hills were created with PTI paper and dies. The sunshiny background was created doing an ombre inking effect with PTI's Hello Sunshine stamp set.
I included a few details that are easily lost in photos, including heat-embossing the apples and pail handles to make them look shiny. I even took the extra time to line the card base and stamp a coordinating design inside!
I just love this set! It makes it so easy to create a fun, homegrown card from the heart!
Thanks ever so much for stopping by!
Today I am posting a project I made for a few challenges: the Mama Elephant Sketch Challenge 02 and PTI's MIM #106: Two-Toned Stamping, and the Ombre Challenge in the Moxie Fab World.
If you would like to play along or check things out for yourself, you can find out all about it all here, here, or here.
I used all ME stamps for my project and all PTI inks and papers. I used the MIM 2-toned effect on the feathers starting at the top with Royal Velvet ink, working on down with Plum Pudding, Winter Wisteria, and finally Lavender Moon.
I de-bossed the background with a woodgrain impression plate, sewed a seam near the spine and added some little pearls purchased at Michaels.
So what are your thoughts on feathers? Are they all the rage in your book?
As far as feathers go, I really like this boxy-shaped one from Mama Elephant!
Thanks ever so much for stopping by!